Any references to third-party products or services do not constitute Boost.space Product Documentation nor do they create any contractual obligations. This material is for informational purposes only and is subject to change without notice.
Boost.space does not warrant the availability, accuracy, reliability, completeness, or usefulness of any information regarding the subject of third-party services or systems.

With WhatsApp Business Cloud modules in Boost.space Integrator, you can:

watch events, send a message, and template messages
upload and download media
enable two-step verification, register, verify, and deregister senders
retrieve and update business profiles
Please note that it is not possible to use the phone number registered in the WhatsApp Business app or your personal WhatsApp number, which you use for communicating with friends and family. You will need a separate dedicated phone number for the API. For more information, please refer to the Could API documentation.
To get started with WhatsApp Business Cloud, you need:
Before you begin, understand the following information about the phone numbers:
The phone number should not be registered with your personal WhatsApp account which you use to communicate with your friends and family. If already registered, delete the existing account on your mobile to register with WhatsApp Business Cloud.
You cannot use the same phone number simultaneously on both on-premise and Cloud API at the same time. Only one platform is supported at a time with the phone number. See overview and phone numbers.
Do not infringe the WhatsApp Terms and Conditions: “If you use anything other than the official WhatsApp Business Platform or other official WhatsApp tools, We reserve the right to limit or remove your access to WhatsApp as this violates our policies. Please do not use any non-WhatsApp authorized third-party tools to communicate on WhatsApp. See Unauthorized use of automated or bulk messaging on WhatsApp for more information”.
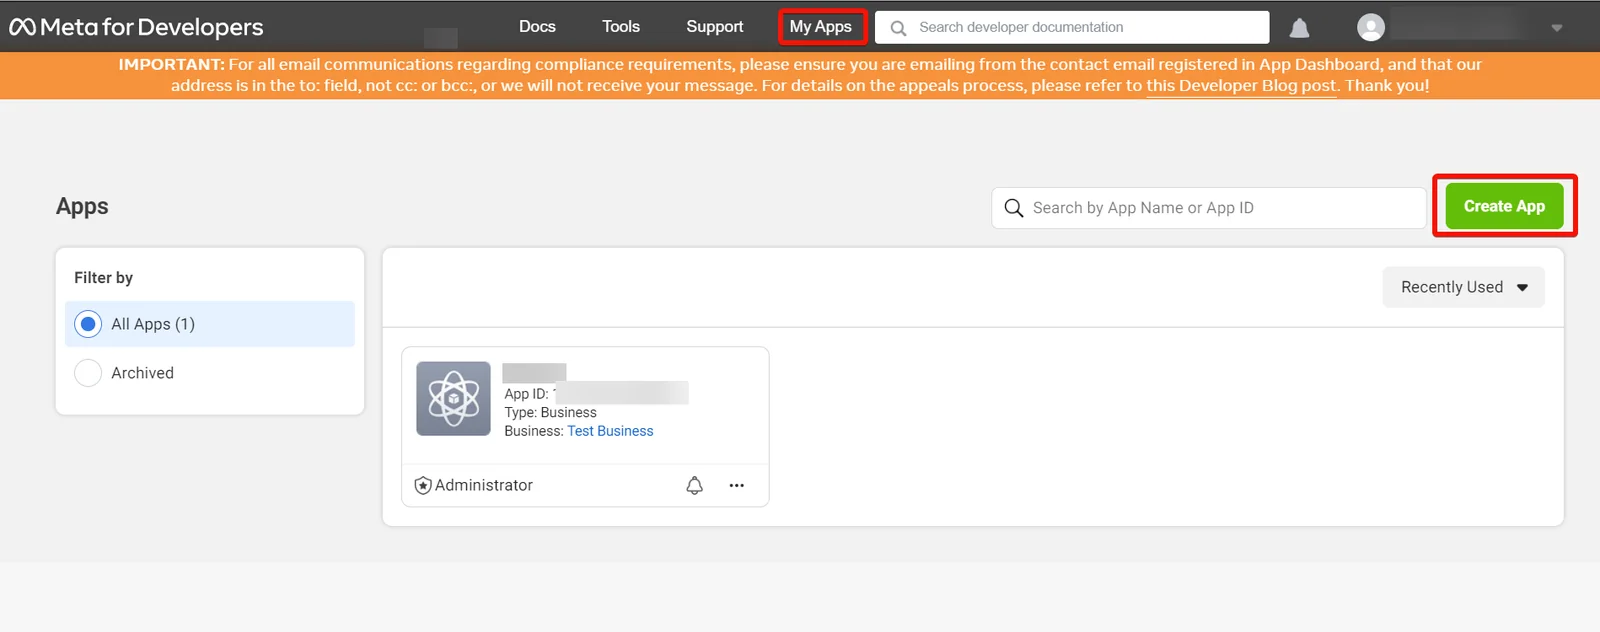
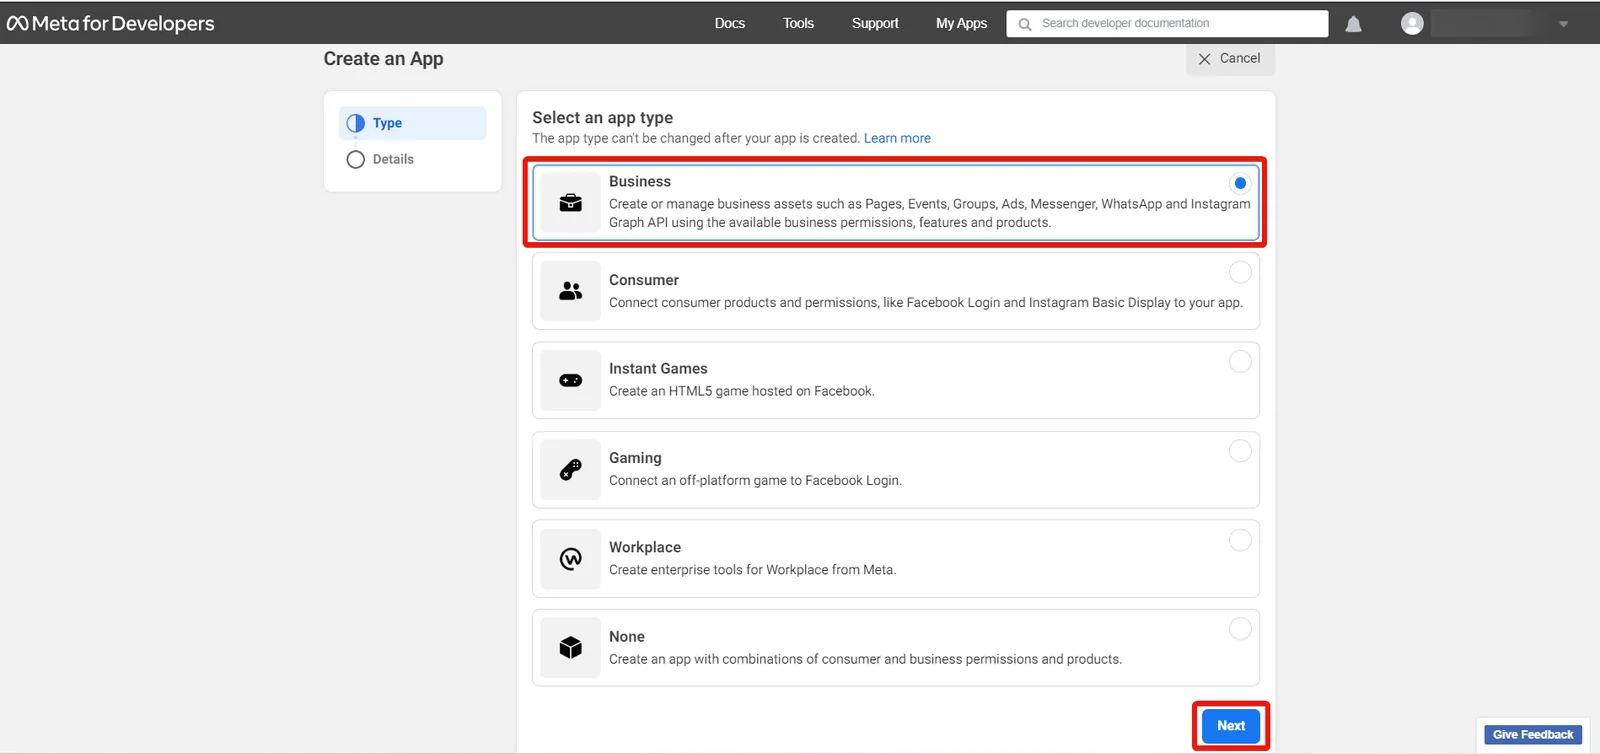
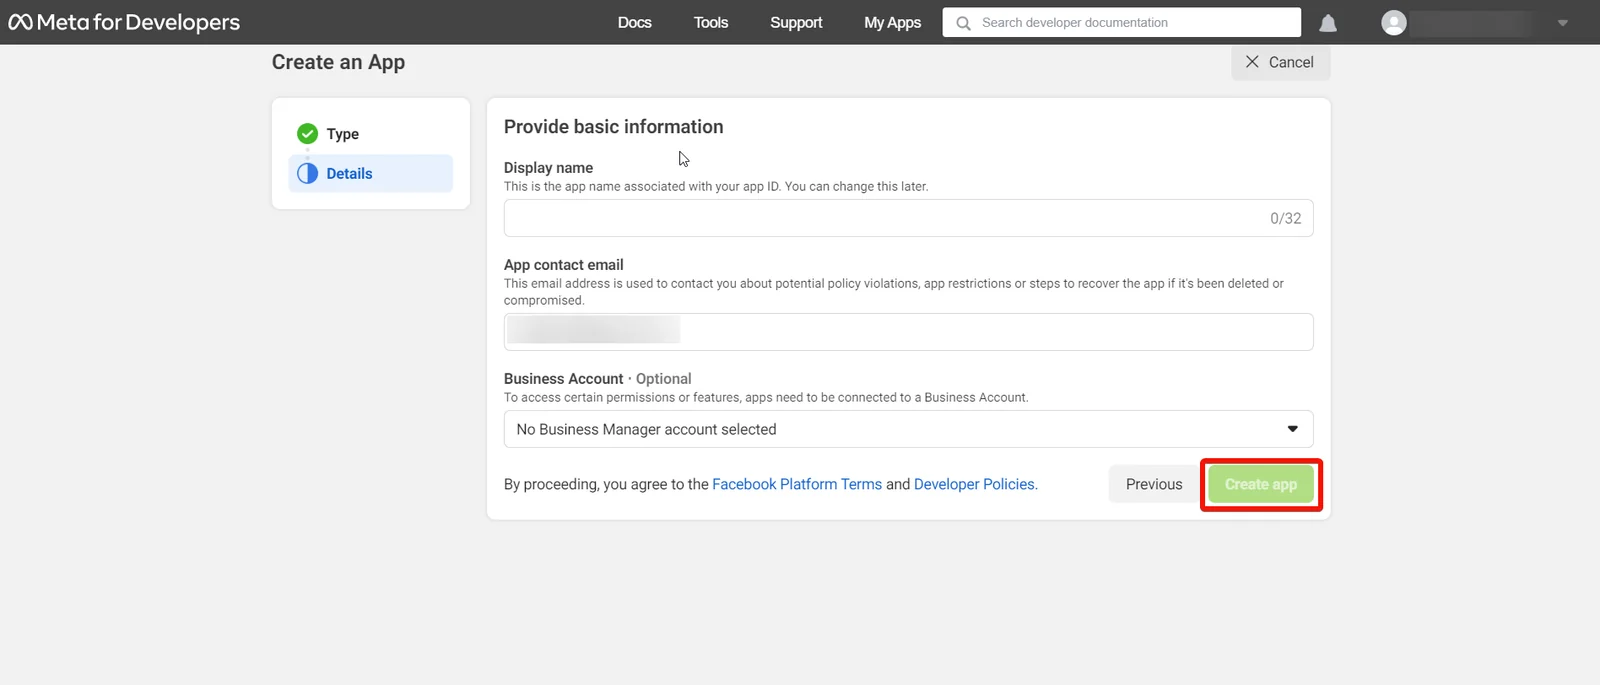
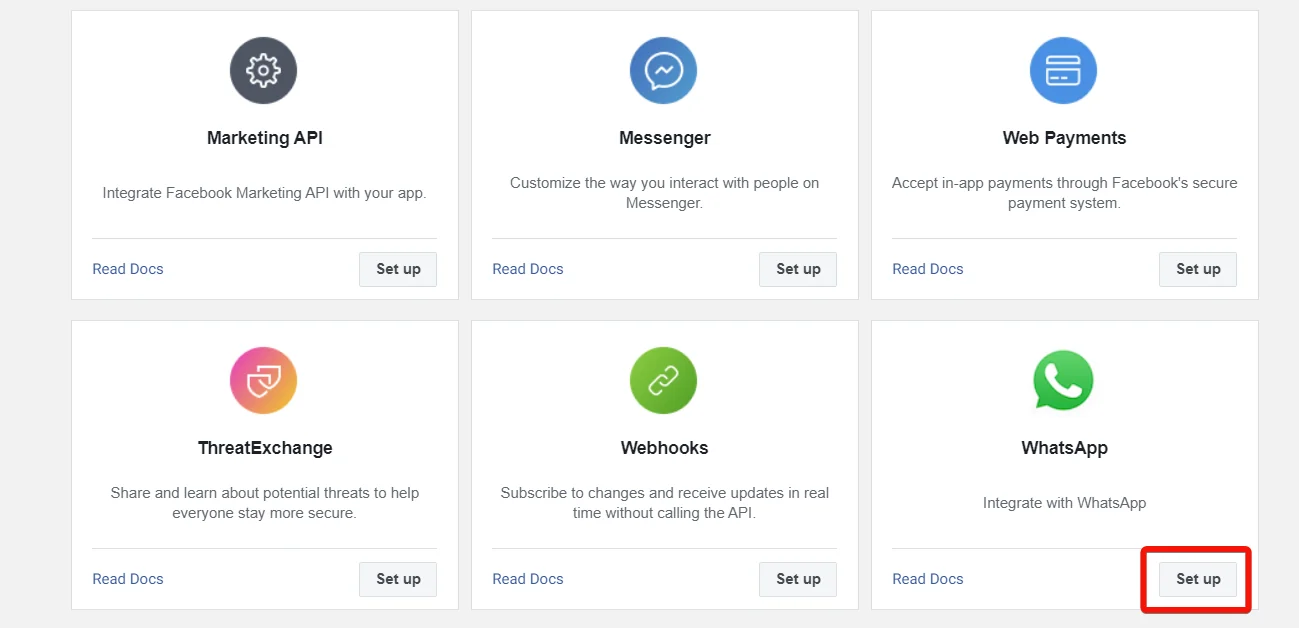
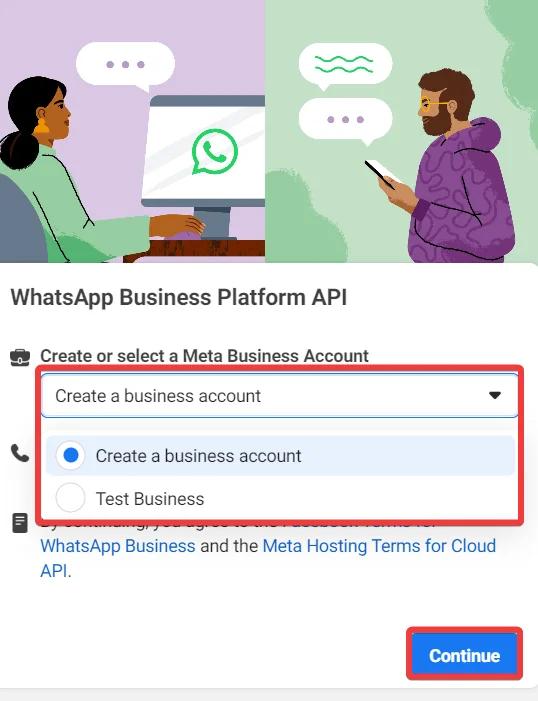
To connect WhatsApp Cloud API to Boost.space Integrator involves the following steps:
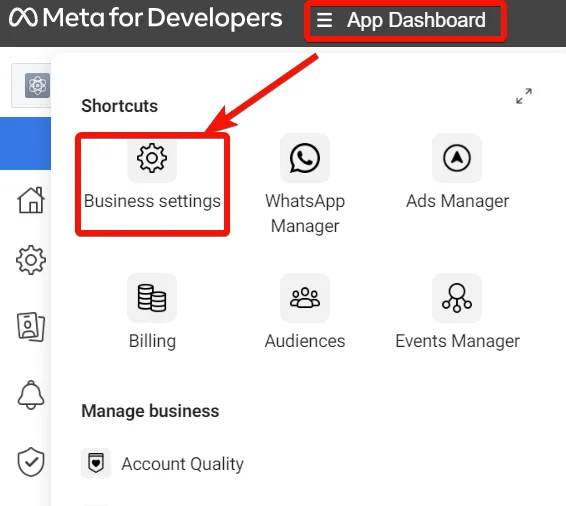
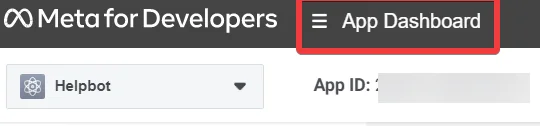
If you don’t see the App Dashboard menu, refresh the page.
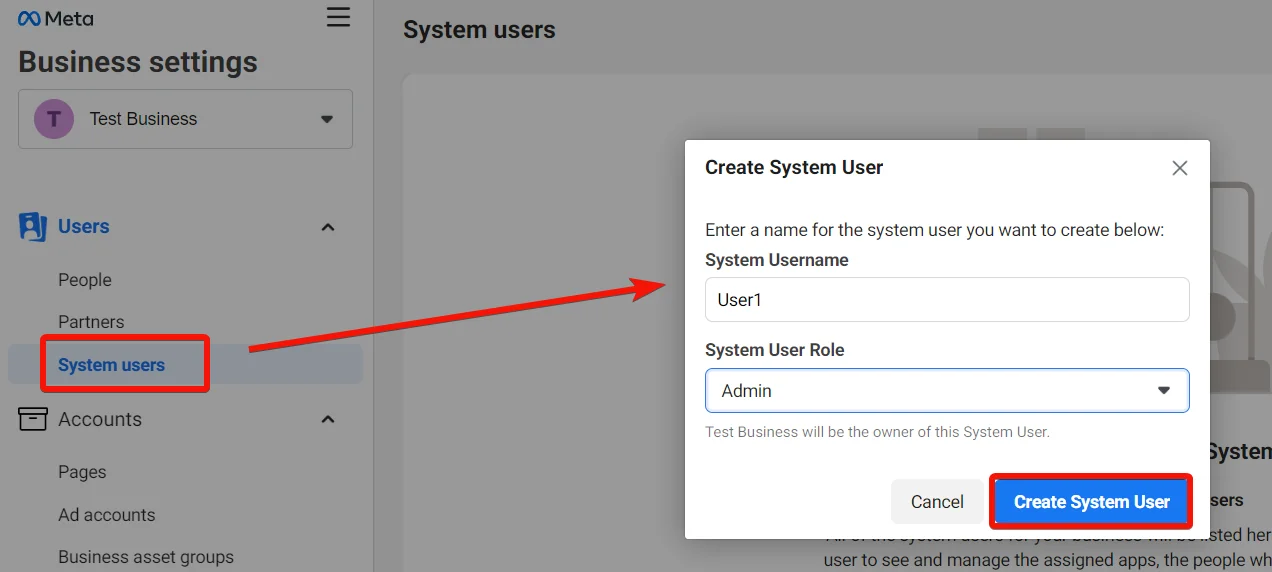
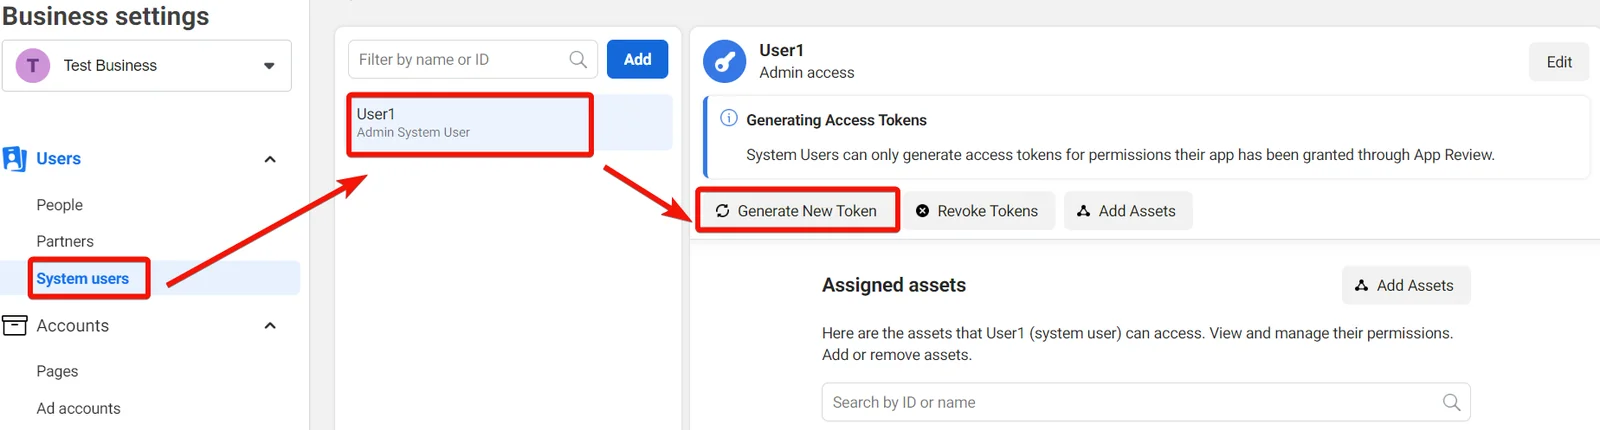
Go to System Users > Add. Enter the username, select the role as Admin and clickCreate System User.
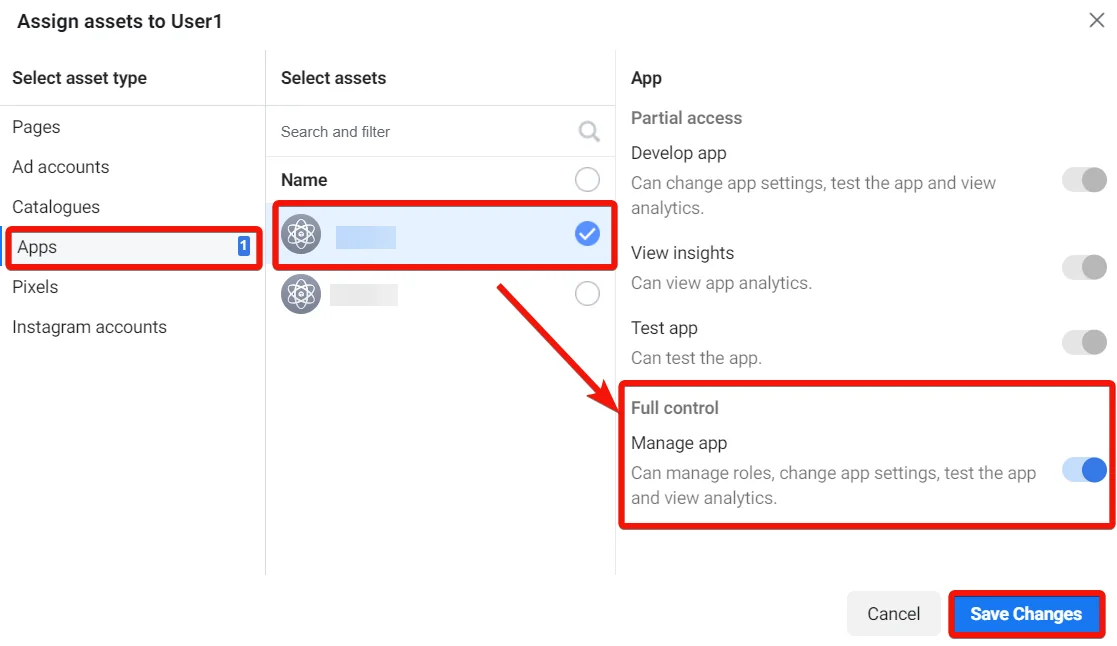
Go to Add Assets > Apps. Select the app you want to assign to the user, enable Full Control access, and click Save Changes.
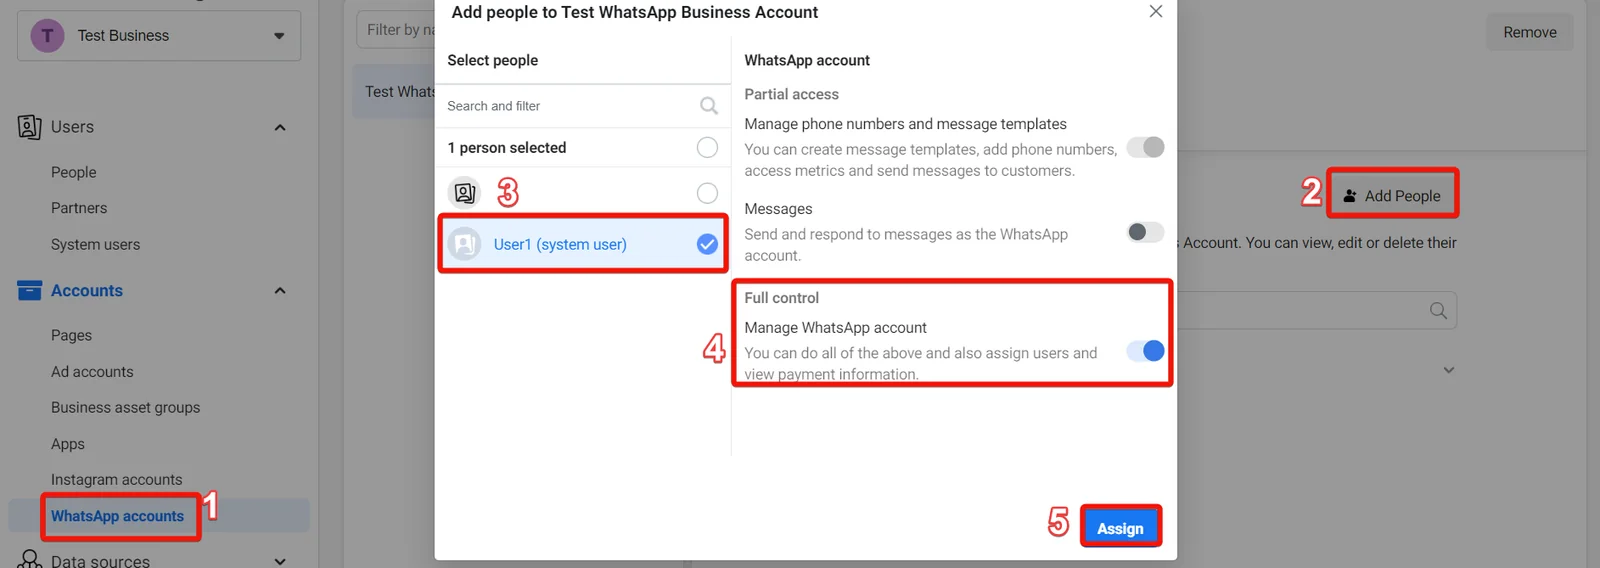
Go to WhatsApp Accounts > Add People > Select the system user > Enable Full Control Access > Assign.
Go to System Users > Select the user > Generate Access Token.
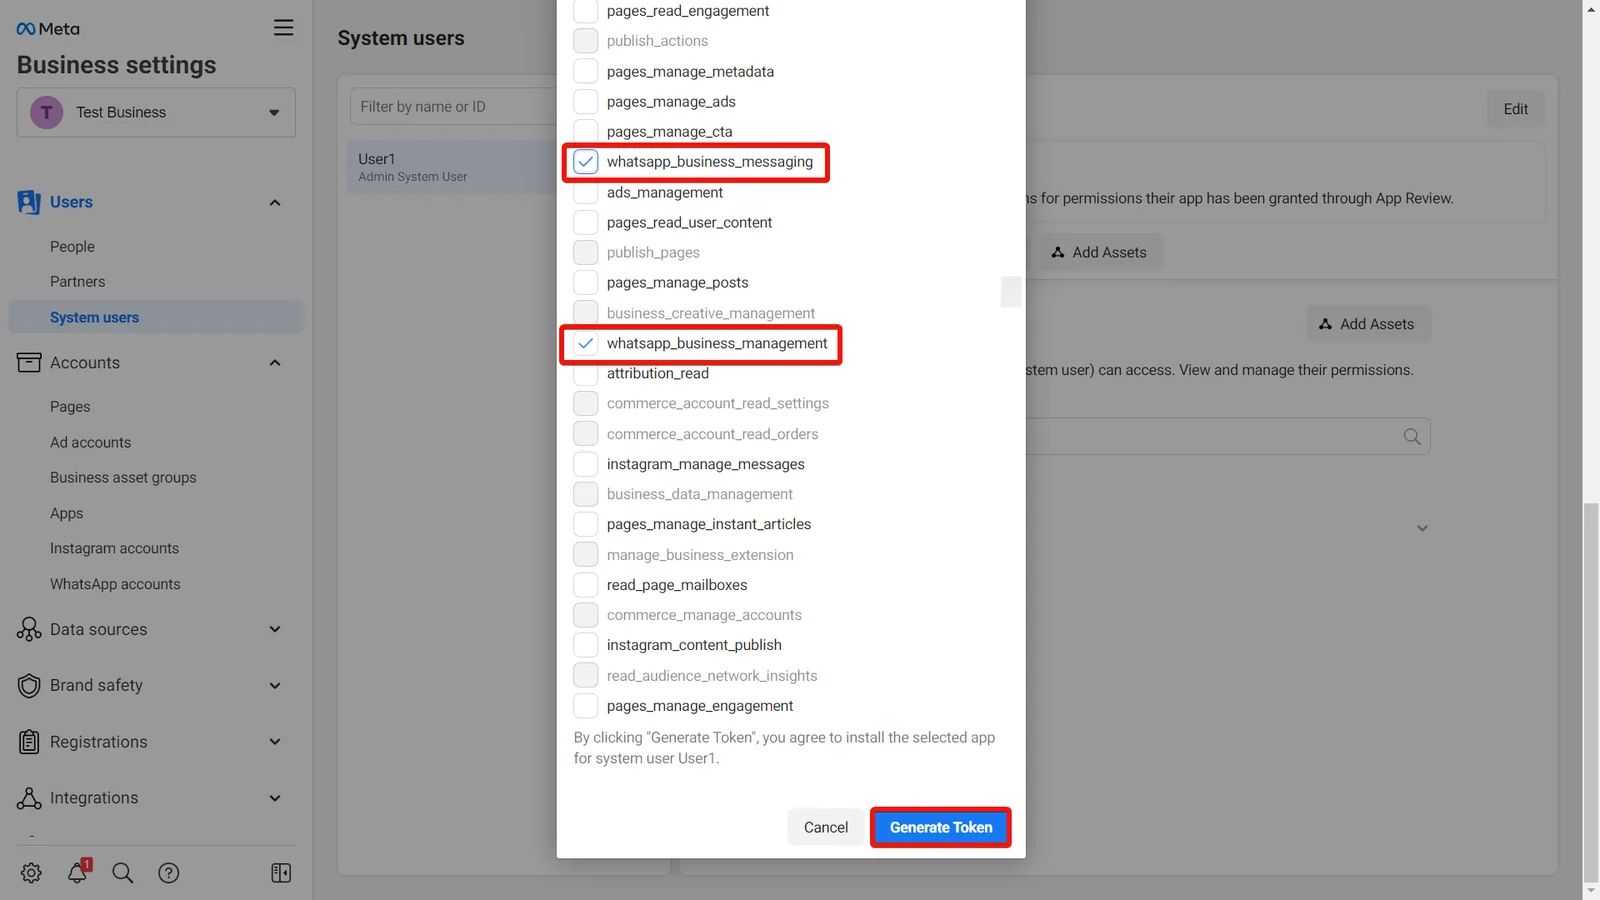
Select the app, following permissions, and then click Generate Token.
whatsapp_business_messaging
whatsapp_business_management
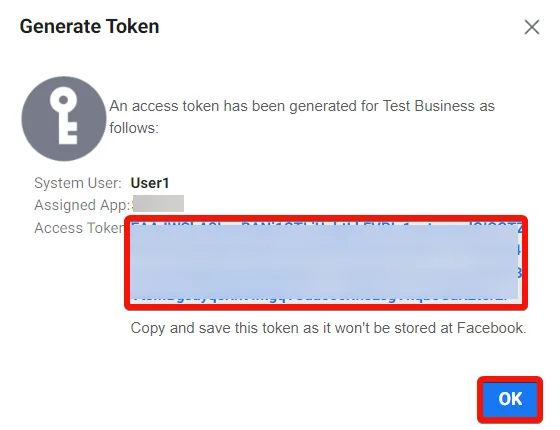
Copy the token to a safe place.
You can use this token as a permanent access token.
Add your own phone number to WhatsApp Business Cloud API
When you set up WhatsApp API, a test number is created for you. You can add your own number.
Log in to your Facebook developer account.
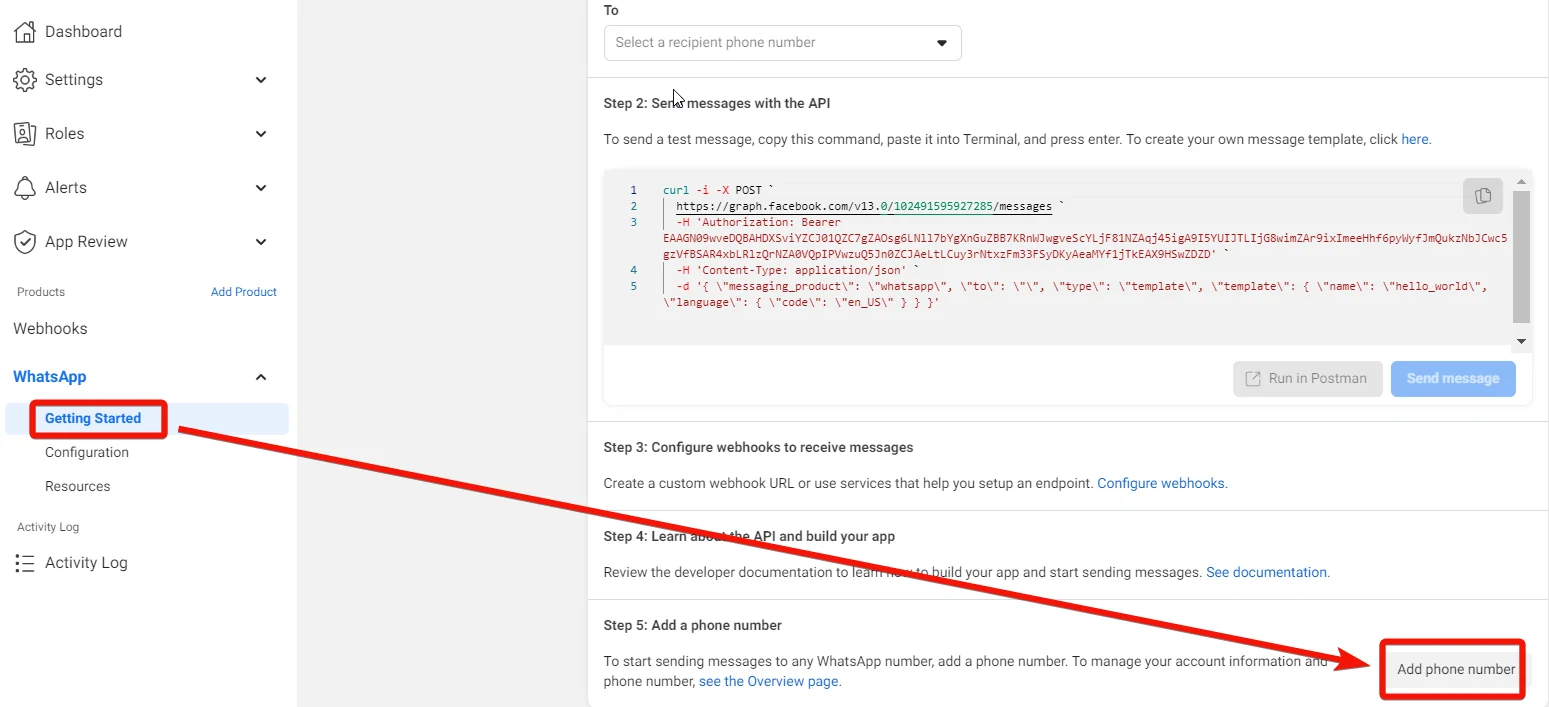
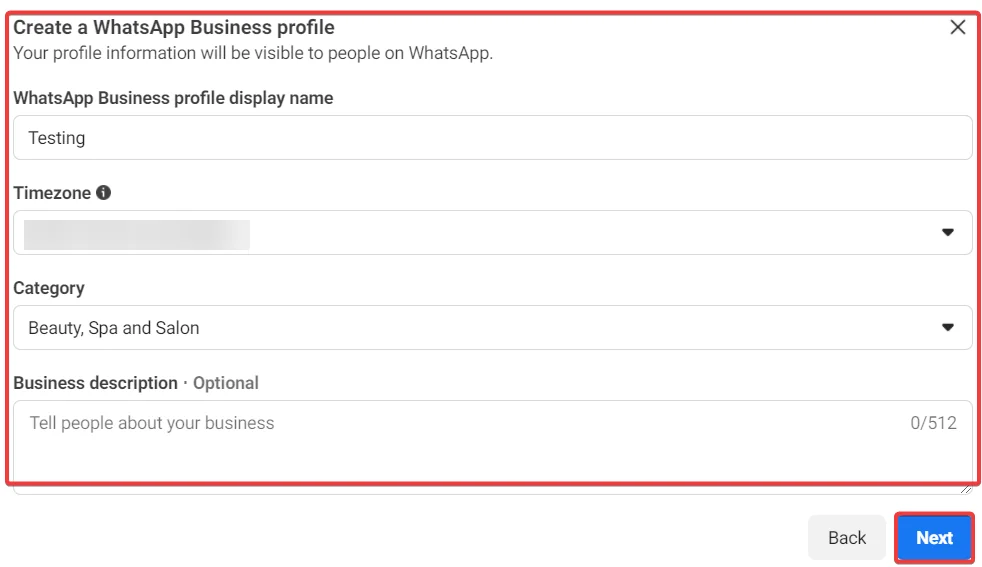
On the Getting Started page, click Add phone number.
Enter your business profile details and click Next.
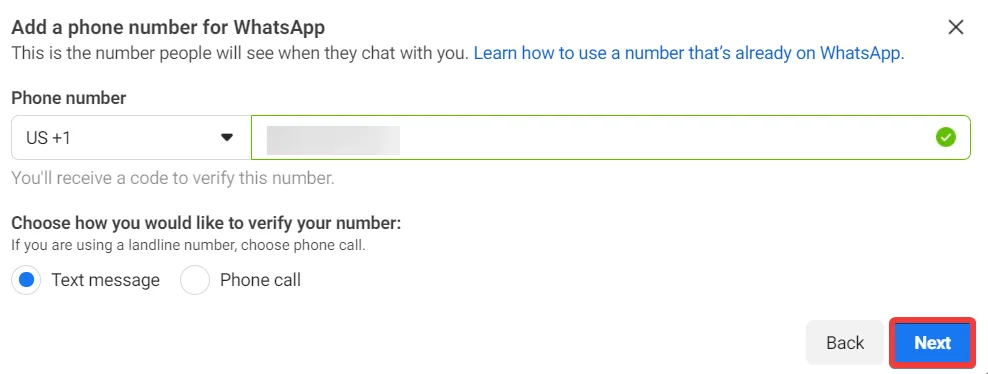
Enter the business phone number that you want to connect to WhatsApp Business API.
Ensure that the phone number is not registered with WhatsApp before. If already registered, delete your WhatsApp account with the number before registering here.
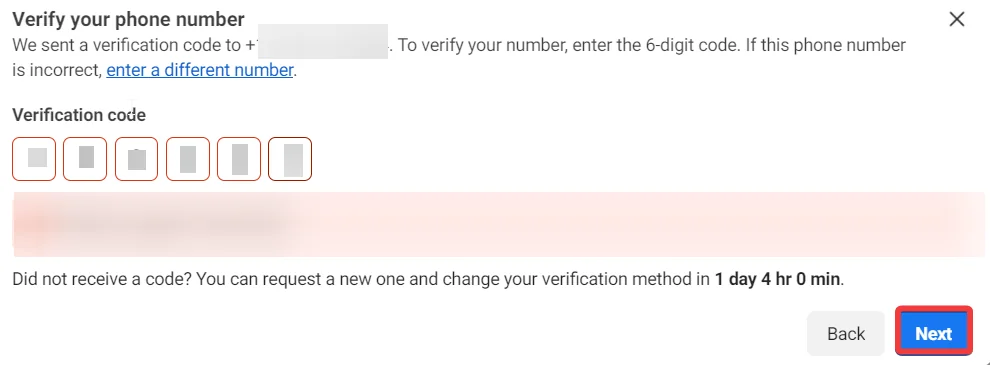
Enter the verification code received on your phone number.
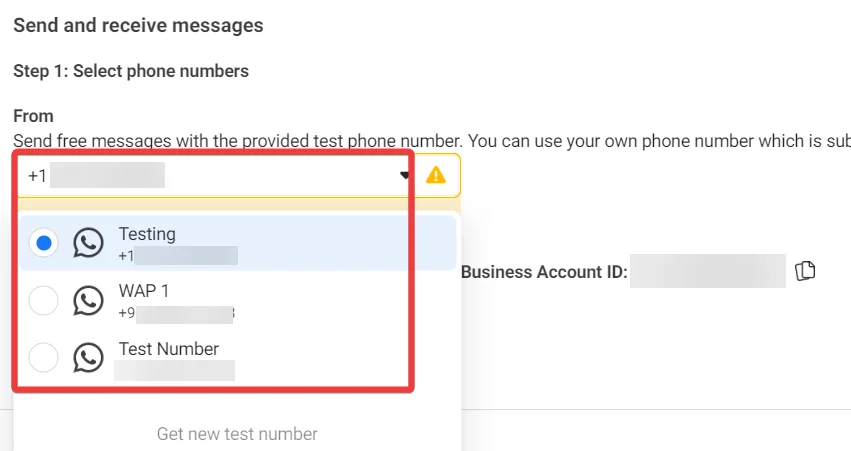
Enter your business details and click Save.
You have successfully added your own business phone number to WhatsApp Business Cloud API.
Connect WhatsApp Business Cloud to Boost.space Integrator
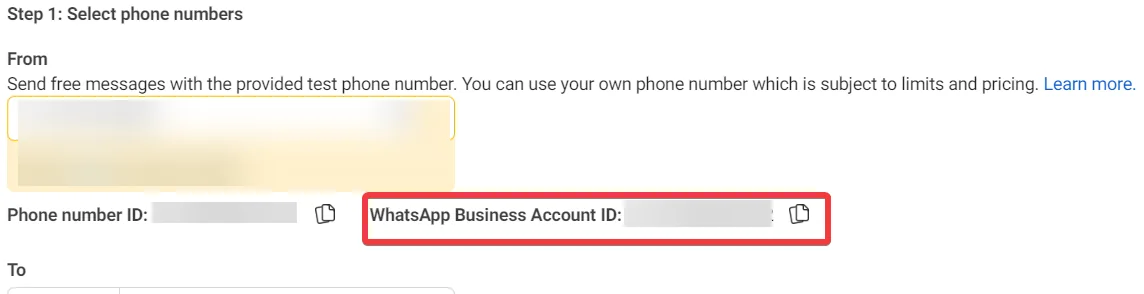
To connect WhatsApp Business Cloud with Boost.space Integrator you need to obtain the Permanent Token and WhatsApp Business Account ID values from your WhatsApp Business Cloud account.
Log in to your Boost.space Integrator account, and add a module from the WhatsApp Business Cloud app into a Boost.space Integrator scenario.
Click Add next to the Connection field.
In the Connection name field, enter a name for the connection.
In the Permanent Token field, enter the token created prior to the connection.
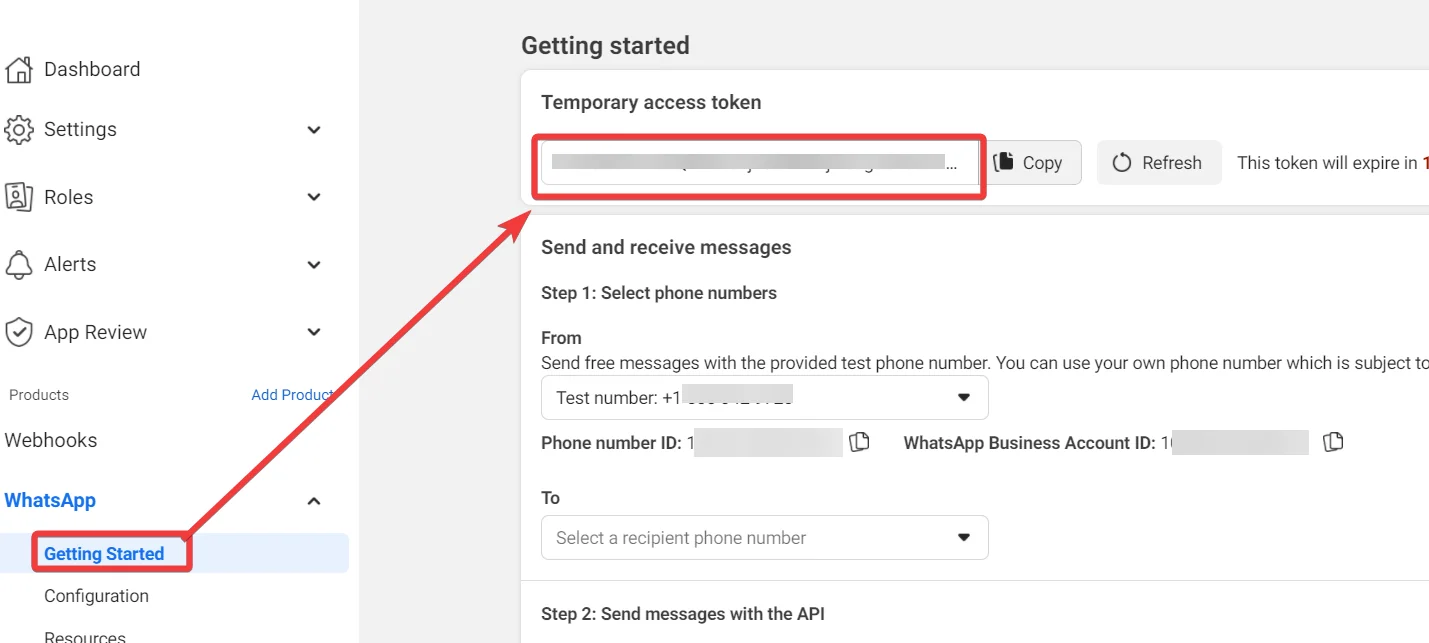
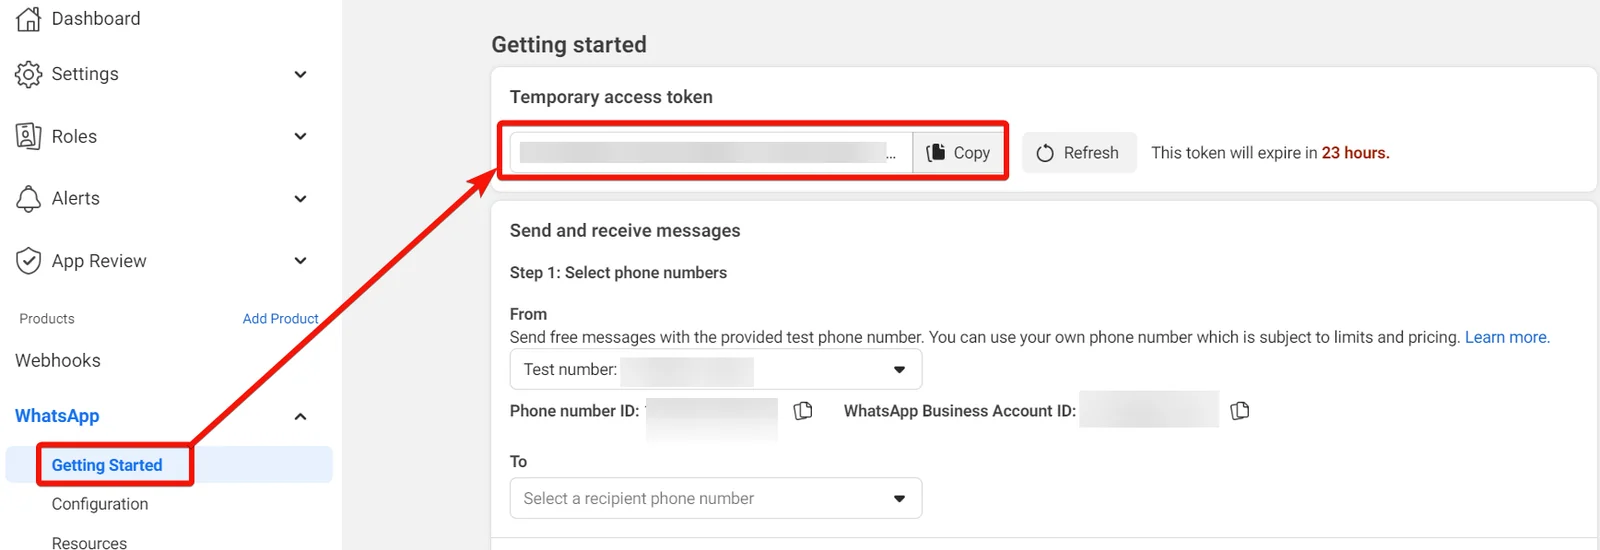
You can also use a temporary token which is only valid for 24 hours and available on the getting started screen.
Boost.space Integrator recommends using the temporary token for testing purposes as it is valid only for 24 hours and you will lose your data once the token expires.
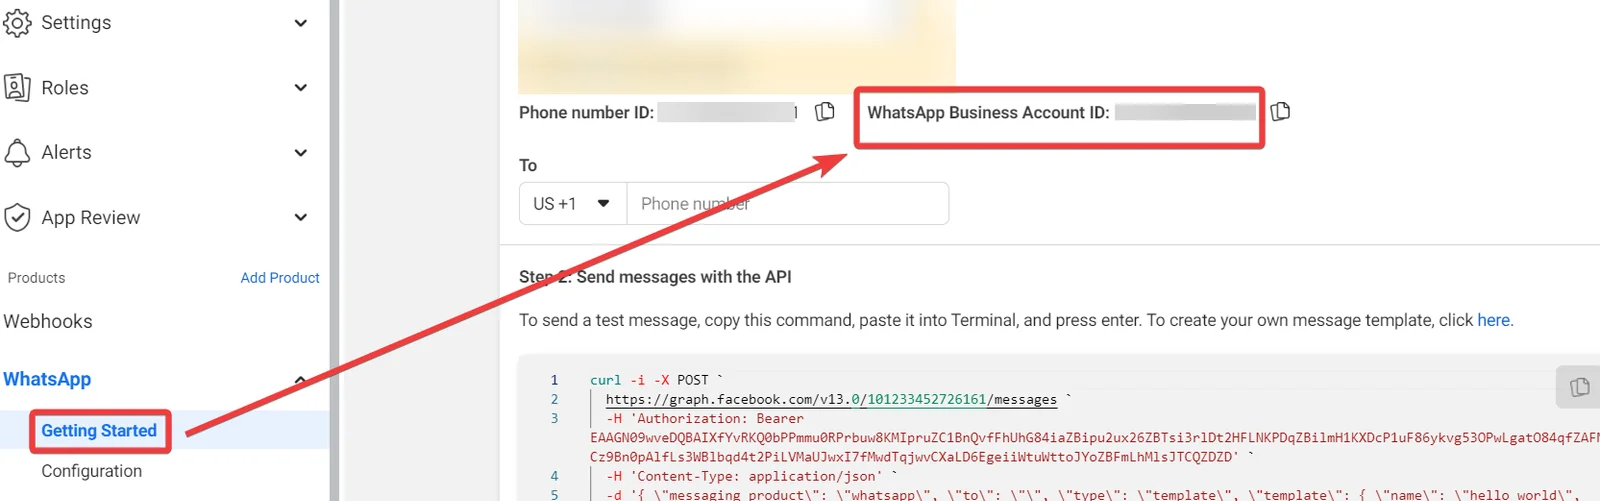
In the WhatsApp Business Account ID field, enter the ID from your Facebook Developer account > WhatsApp > Getting Started section screen, and click Save.
You have successfully connected the WhatsApp Business Cloud app and can now build scenarios.
Message
You can watch events, and send messages using the following modules.
You can send a message using this module if you satisfy the below conditions:
Your business number phone number must be first approved by WhatsApp before you use it for sending messages.
You can only initiate new chats via Send a Template module. Only after sending a templated message to a specific customer and receiving a response from the customer, you can use this Send a Message module to send a non-templated message to the customer.
If a customer contacts you first, then you can reply to the customer with this Send a Message module for the next 24 hours.
Enter the receiver’s phone number without any prefixes such as +, spaces, (), and _ . For example, if the receiver phone number is +1-212-345-6789, then you must enter it as 12123456789.
If you are using your own phone number, the receiver field accepts both WhatsApp ID and a phone number in any dilable format with country code. However, Boost.space Integrator recommends explicitly prefixing the country code with a plus sign (+). Some of the examples of supported phone number formats are:
+1-212-345-6789
+1 (212) 345-6789
+1 212 345 6789
+1 (212) 345 6789
Message Type
Select the message type. For example, image.
Based on the selection, dynamic fields auto-populate, and you need to enter the details to send the message. For more details on these dynamic fields, see WhatsApp Business Cloud Messages API documentation.
Enter the receiver’s phone number without any prefixes such as +, spaces, (), and _ . For example, if the receiver phone number is +1-212-345-6789, then you must enter it as 12123456789.
If you are using your own phone number, the receiver field accepts both WhatsApp ID and a phone number in any dilable format with country code. However, Boost.space Integrator recommends explicitly prefixing the country code with a plus sign (+). Some of the examples of supported phone number formats are:
+1-212-345-6789
+1 (212) 345-6789
+1 212 345 6789
+1 (212) 345 6789
Message Template
Select or map the message template you want to send.
Media
You can upload and download media using the following modules.
Select or map a Sender ID whose two-step verification you want to enable.
PIN
Enter (map) a 6-digit pin you wish to use for two-step authentication. To disable or reset two-step verification, see the WhatsApp Business Cloud documentation.
Select or map the Sender ID whose business profile you want to update.
Address
Enter the address of the business.
Description
Enter the business details.
Vertical
Select or map the industry of the business. For example, finance.
Email
Enter the contact email address of the business.
Websites
Add the business website URL address.
For example, a website, Facebook Page, or Instagram. You must include the http:// or https:// portion of the URL.
File
Enter (map) the file details:
Profile Picture File Name
Enter the file name of the profile picture.
Profile Picture Data
Enter the path to the file stored in your local directory. For example, "@/local/path/file.jpg".
Setting up WhatsApp Business Cloud webhooks
Log in to your Boost.space Integrator account.
Open the Watch Events module, enter a name for the webhook, click Save, and copy the URL address to your clipboard. Click OK and Save the trigger.
Go to App Dashboard, click Webhooks > Subscribe to this object to enable the webhooks.
When prompted enter the Callback URL copied in step 1 and the Verify token.
The verify token is the Temporary access token or permanent access token but it has to be same in the Boost.space Integrator and WhatsApp account.
For more information on webhooks, see the WhatsApp Business Cloud documentation.
Add Recipient’s Phone Number
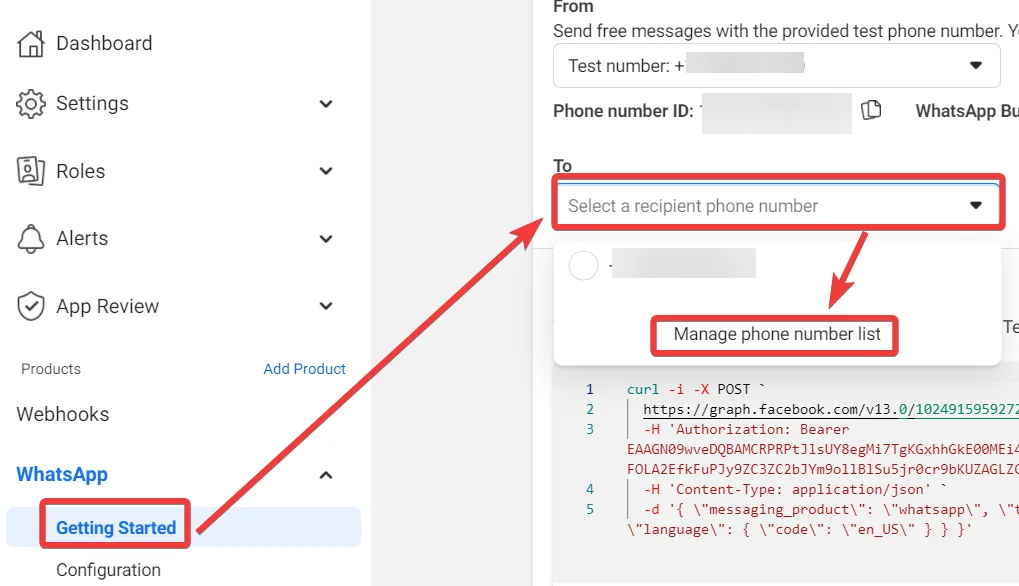
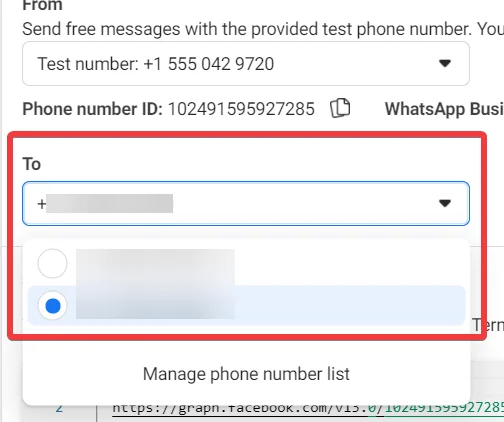
If you are using a testing number to send messages you must add the recipients to your WhatsApp account in the Facebook Developer account. You can add a maximum of five recipients’ numbers that are enabled with WhatsApp.
To add the recipient’s phone number:
Log in to your Facebook Developer account.
On the left menu, click WhatsApp > To > Manage phone number list.
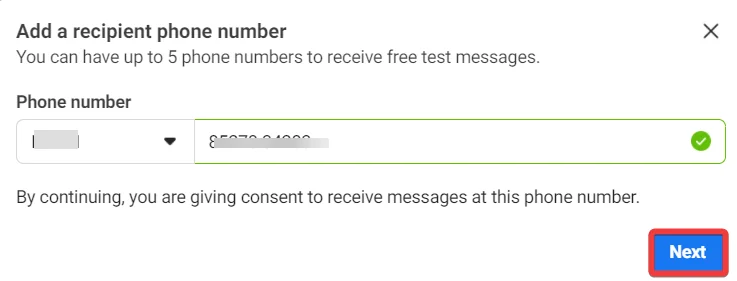
Add the phone number and click Next.
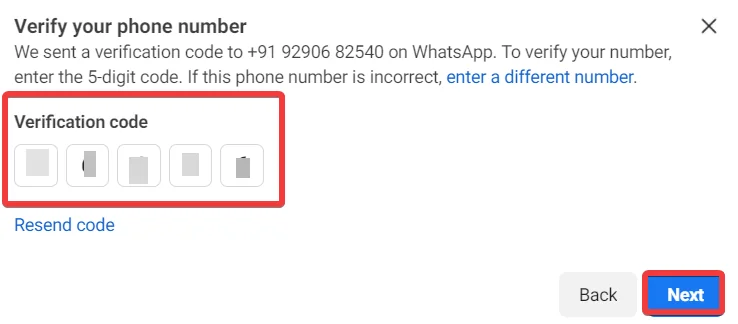
Enter the verification code received on your WhatsApp and click Next.
The recipient’s number is successfully added to the list.
Troubleshooting the WhatsApp Business Cloud
Some of the errors that you might encounter when using WhatsApp Business Cloud.
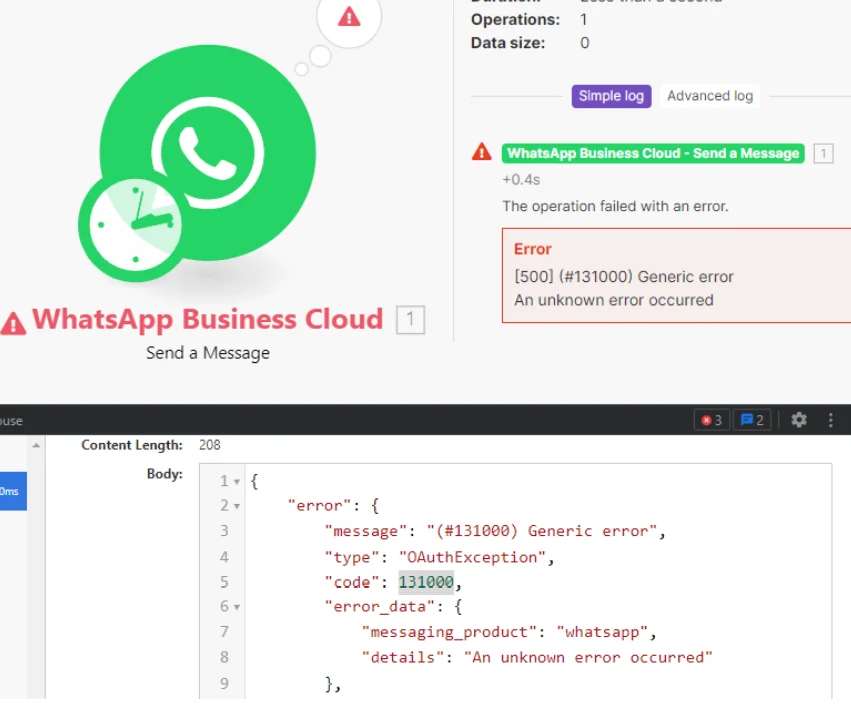
WhatsApp API – Error 500 code 13100
The user gets an error 500 from the module and the DevTool > Response Body shows error code 131000.
You can only initiate new chats via Send a Template module. Only after sending a templated message to a specific customer and receiving a response from the customer, you can use this Send a Message module to send a non-templated message to the customer.
If you’re using a testing number, you must first register up to five authorized recipient numbers in WhatsApp Manager before sending messages to them. See Add Recipient’s Phone Number.
Error validating access token
This error indicates that your session in Whatsapp has expired. To resolve it, reauthorize the connection in Boost.space Integrator.
Log in to your Boost.space Integrator account.
In the left sidebar, click Connections, and find the connection that you use for Whatsapp Business Cloud.
Click Reauthorize.
If prompted, reauthorize account and confirm access.
Legacy article, imported from the original Boost.space knowledge base (/knowledge-base/applications/communication/whatsapp-business-cloud/).