Shopify modules allow you to monitor, create, update, delete, and search orders, products, product variants, product images, customers, articles, pages, refunds, inventory, abandoned checkouts, and transactions on your Shopify account.
Prerequisites
A Shopify account
In order to use Shopify with Boost.space Integrator, you must have a Shopify account. Create a Shopify account at www.shopify.com/signup.
Shopify offers a type of connection through a Custom app (displayed as Shopify (custom or private apps)) – use this if the standard connection does not work.
Connecting Shopify using a Shopify private or custom app
Use the Shopify (custom or private app) connection type if the standard Shopify connection type does not work for you.
This connection type requires creating a custom app in your Shopify store.
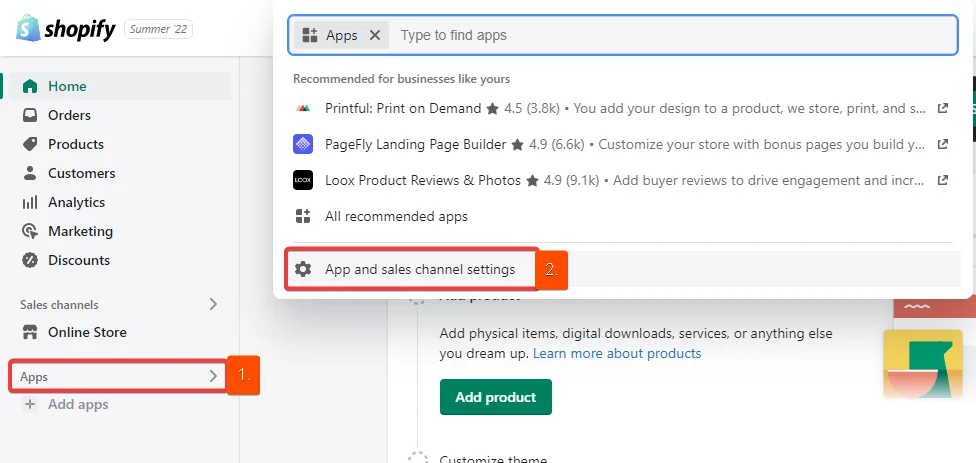
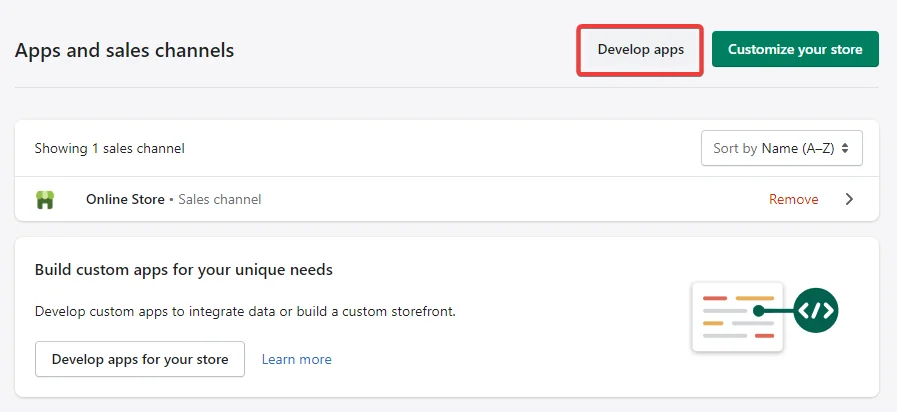

Log in to your Shopify store, click Apps, then click App and sales channel settings.
On the Apps and channels screen, click Develop apps.
Click Allow custom app development, then confirm this action again by clicking Allow custom app development on the next screen.
This will allow you to create an API token that you will use when creating the connection in Boost.space Integrator.
Click Create an app.
Type an App name, select an App developer, and click Create app.
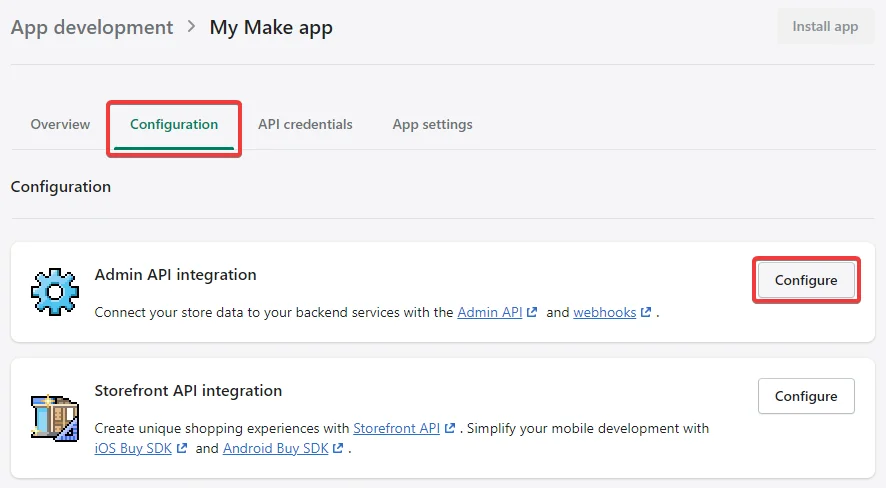
Click Configuration, then click Configure next to Admin API integration.
On the Admin API integration screen, select scopes (permissions) that represent the actions you will need Boost.space Integrator to perform. Then click Save.
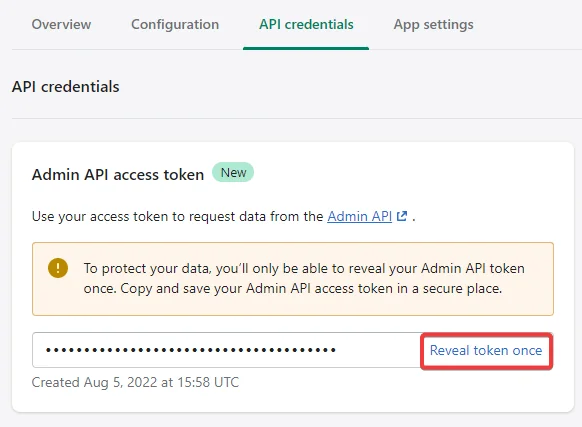
Switch to the API credentials tab and under Access tokens, click Install app. In the dialog that appears, confirm the action by clicking Install app.
Shopify creates an Admin API access token. Click Reveal token once and copy the token. You will enter this token into Boost.space Integrator in the next step.
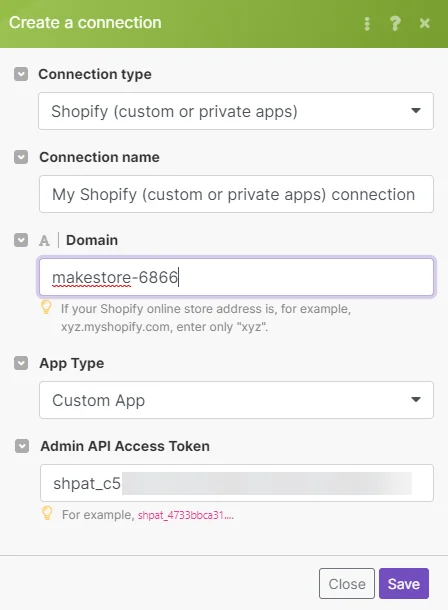
In Boost.space Integrator, add a Shopify module to a scenario. Under Connection, click Add, then fill in the required details shown in the following image.
Click Save.
Creating Fulfillment Using Boost.space Integrator
To create a fulfillment, you’ll need to identify line items in an order and retrieve the line item’s variant and inventory level.
Add the following modules to your scenario to create the fulfillment:
1. Get an Order or Watch Orders – to retrieve all line items of the order that you want to create fulfillment for.
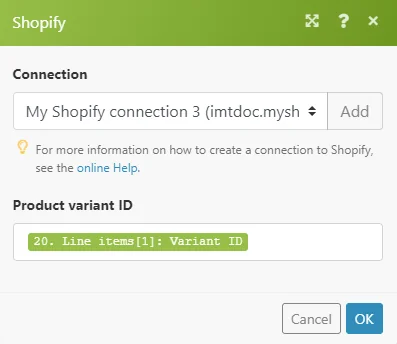
2. Get Product Variant – to find the specific variants that are associated with the inventory item that you want to fulfill. You can find the _Inventory item ID_in the module’s output.
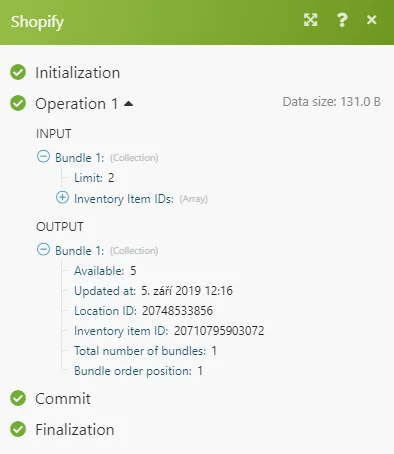
Search for Inventory Levels – to retrieve the inventory level for that item and the location where it’s stocked.
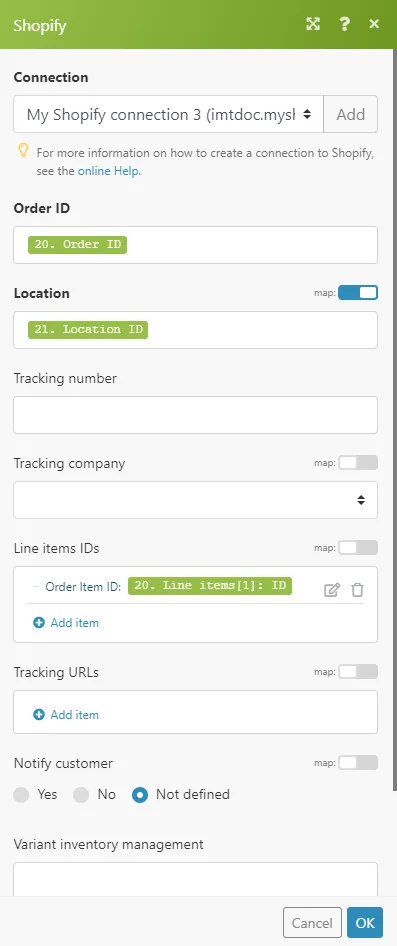
You can see in the module’s output that the variant is stocked at one location. The next step shows how to create a fulfillment from the 20748533856 location.
4. Create a Fulfillment – to create the fulfillment.
Public App Connection
Use this to connect your Public App created in your Partner Dashboard.
To create an app:
From your Partner Dashboard, click Apps> Create app.
Provide an app name, URL, and Redirect URLs.
Click Create app. You are directed to your app’s overview page, where you can view the API key and API secret that you will need for the module’s connection configuration.
Connection Type
Shopify (public apps).
Connection name
Enter the name of the connection.
Domain
Enter the name of your Shopify domain. If your Shopify store address is https://mystore.myshopify.com, enter “mystore“.
Client ID
Enter the API key for the app, as defined in the Partner Dashboard.
Client Secret
Enter the API secret key for the app, as defined in the Partner Dashboard.
Scope
Specify needed scopes. If you requested both the read and write access scopes for a resource, then enter only for the write access scope. The read access scope is omitted because it’s implied by the write access scope. For example, if your request included scope=read_orders,write_orders, then check only for the write_orders scope.
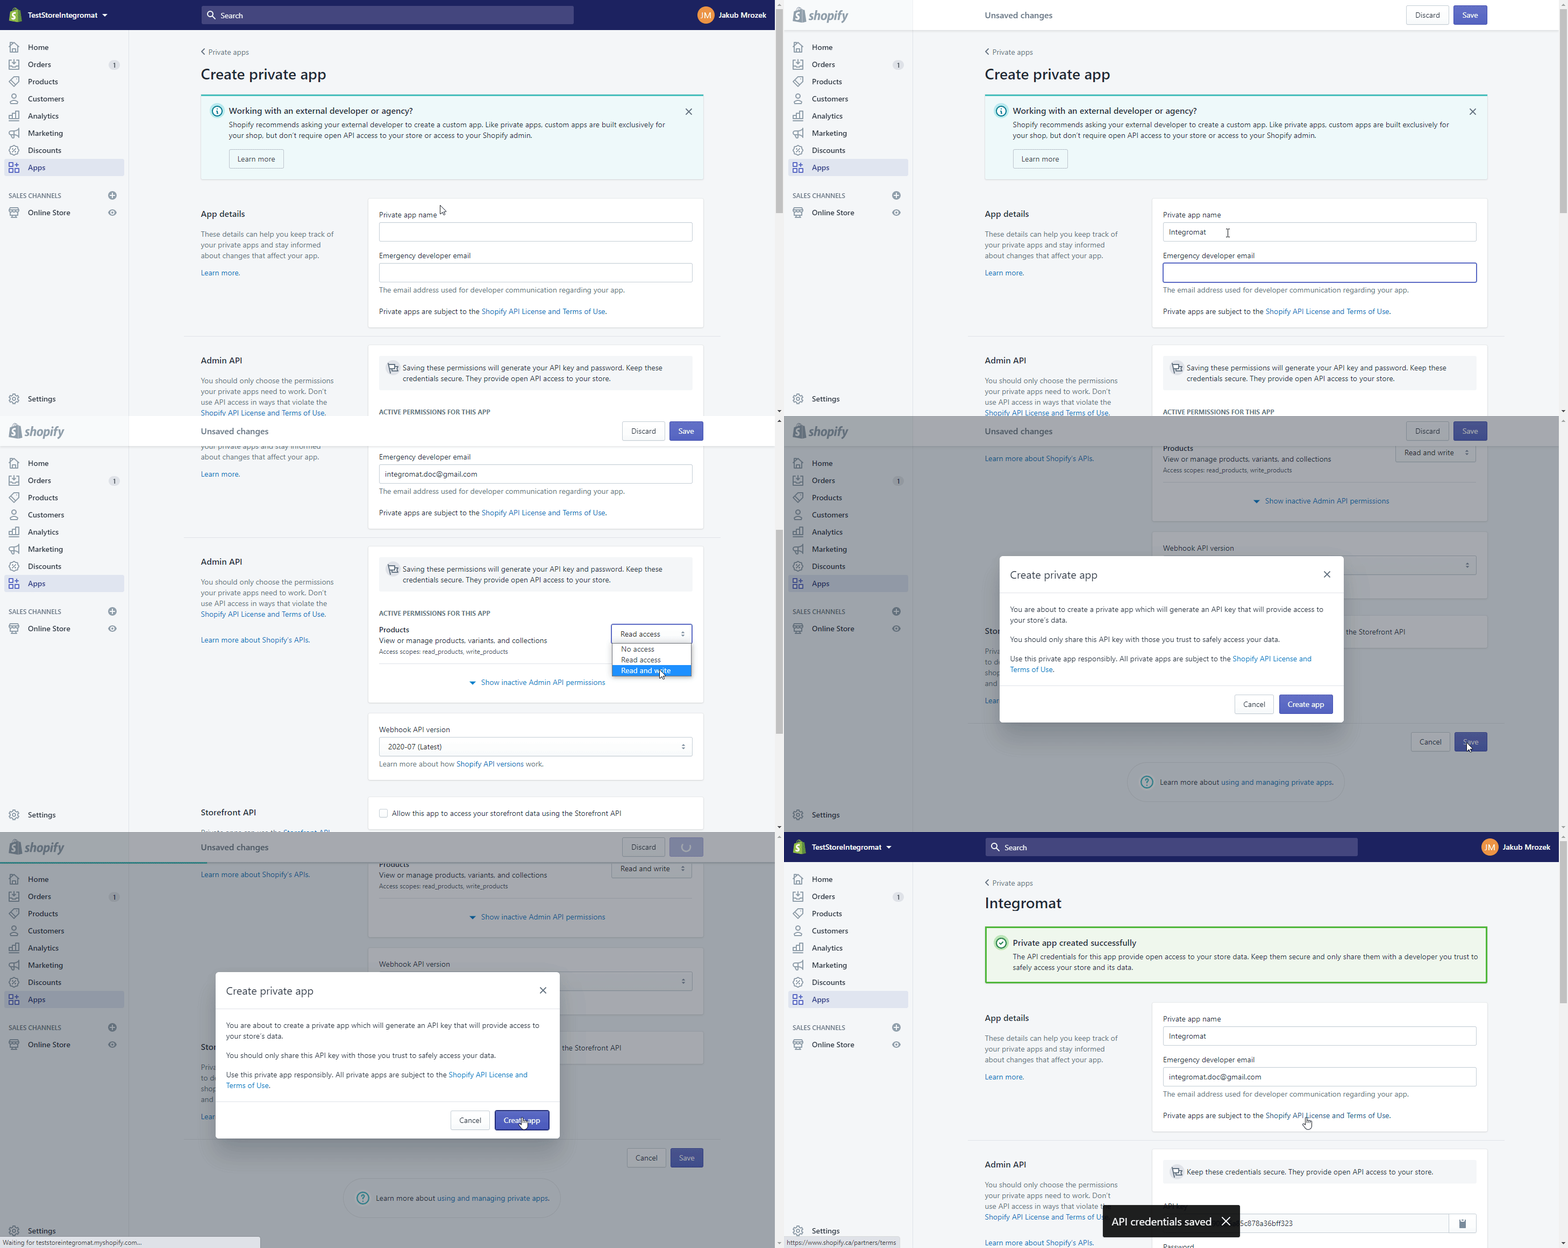
To establish a private app connection, you need to create a private app to obtain the API Key and Password.
1. Log in to your Shopify administration (https://{yourShopifyDomain}.myshopify.com/admin).
2. Navigate to Apps > Manage private apps.
3. Click the Create new private app button (
).
4. Fill in the required fields, click Save, and Create App.
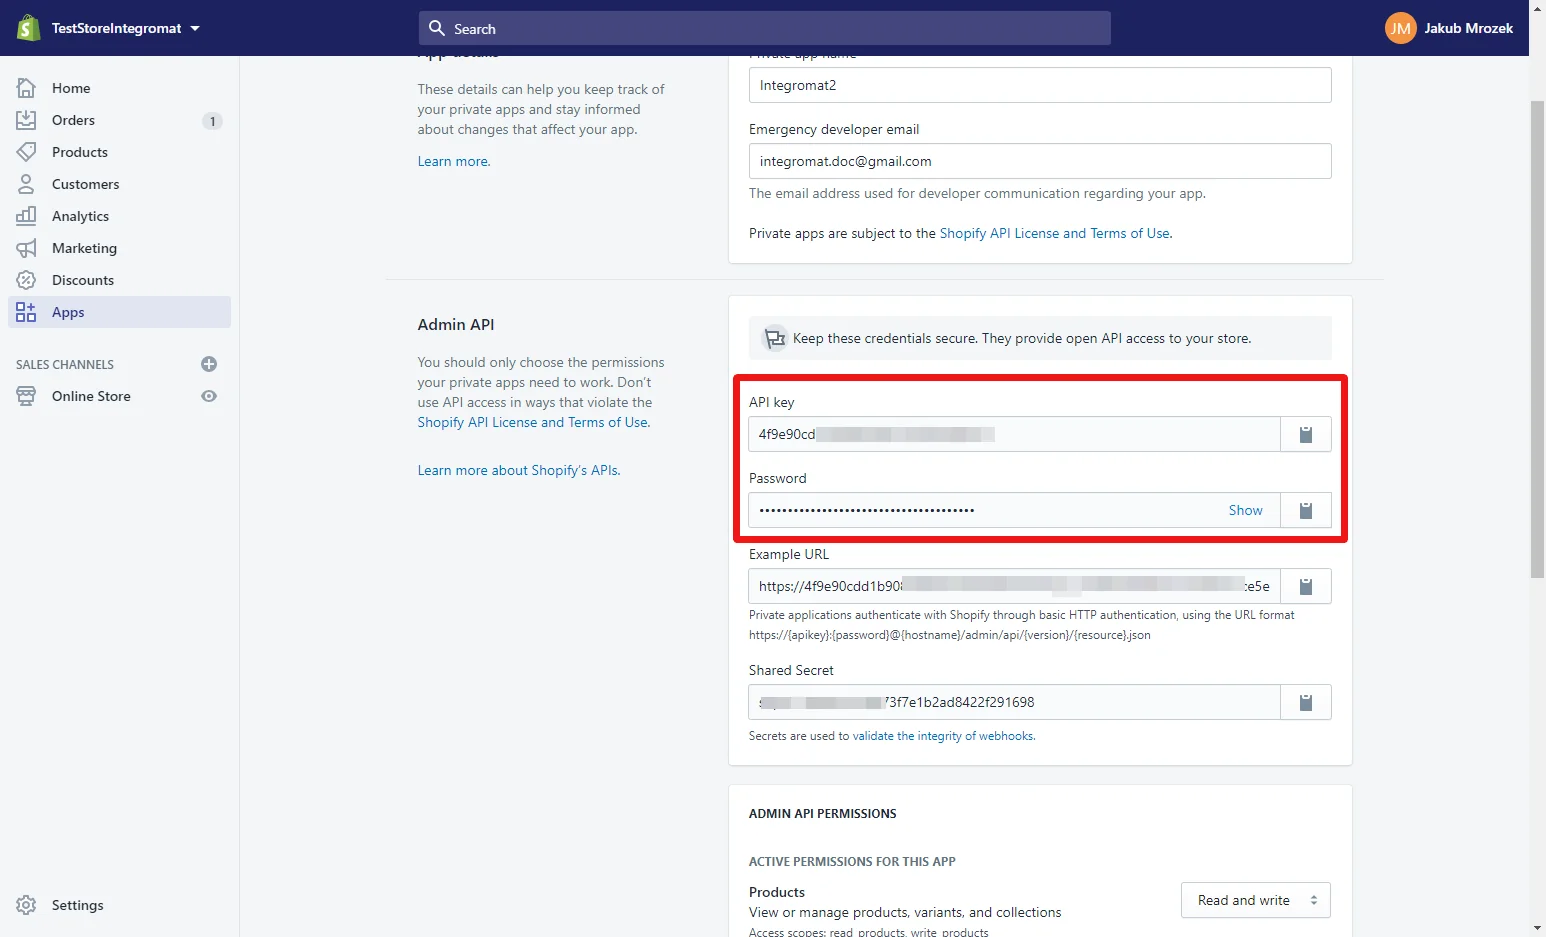
5. Find the generated API Key and Passwordin the Admin API section.
6. Go to Boost.space Integrator, and open the Make an API Callmodule’s Create a Connection dialog for the Shopify private app.
7. Enter the Domain (if your Shopify online store address is, for example, xyz.myshopify.com, enter only “xyz“.) and API Key and Password provided in step 5 to the respective fields, and click the Continue button to establish the connection.
The connection has been established. You can set up the private app’s Make an API Call module.
Build Shopify Scenarios
After connecting the app, you can perform the following actions:
Orders
Create an Order
Create a Draft Order
In the output, the Shipping Line field is sometimes empty because the user must have at least one item in the item list that requires shipping.
If not specified, the item will be treated as not requiring shipping, and Shopify will ignore Shipping Lines. This is the expected behavior.
Import a B2B OrderOnly available for stores on the Shopify Plus plan.
Update an Order
Delete an Order
Close an Order
Reopen an Order
Cancel an Order
Get an Order
Count Orders
Search for Orders
Watch Orders
Search for Risks
Products
Create a Product
Update a Product
Delete a Product
Get a Product
Search for Products
Watch Products
Product Variants
Create a Product Variant
Update a Product Variant
Delete a Product Variant
List Product Variant
Get a Product Variant
Product Images
Upload a Product Image
Delete a Product Image
List Product Images
Collects
Create a Collect
Delete a Collect
Search for Collects
Get a Collect
Custom Collections
Search for Custom Collections
Create a Custom Collection
Get a Custom Collection
Update a Custom Collection
Delete a Custom Collection
Customers
Create a Customer
Update a Customer
Delete a Customer
Get a Customer
Search for Customers
Watch Customers
List Customer Addresses
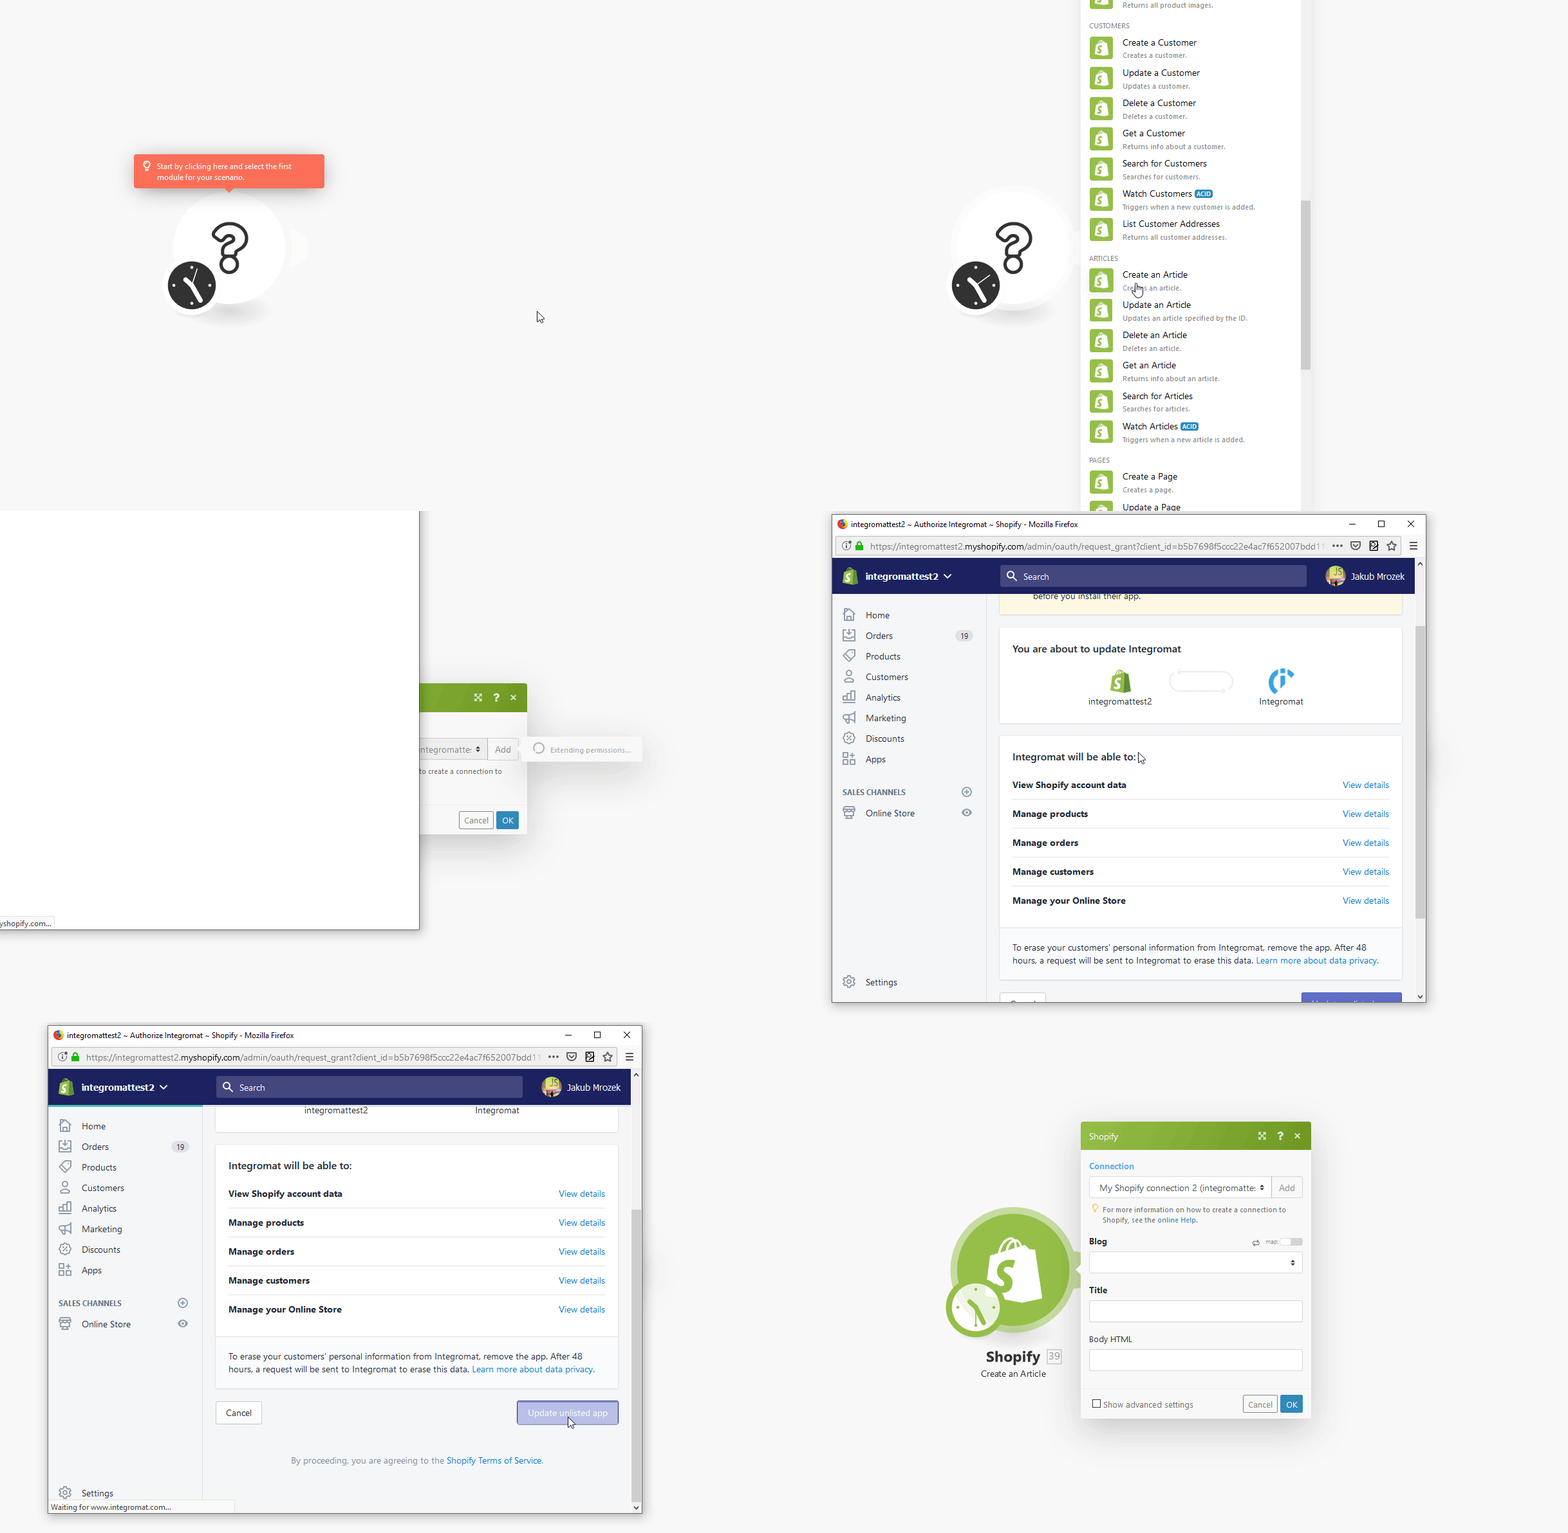
Sometimes it is necessary to extend existing permissions in order to work with other objects (orders, customers, products, etc.)
Send an Invitation
Articles
Create an Article
Update an Article
Delete an Article
Get an Article
Search for Articles
Watch Articles
Pages
Create a Page
Update a Page
Delete a Page
Get a Page
Search for Pages
Watch Pages
Refunds
Get a Refund
Search for Refunds
Fulfillments
List Fulfillments for a Fulfillment Order
Create a Fulfillment for Fulfillment OrdersBefore you create a fulfillment, it’s helpful to understand some of the different fulfillment-related resources:
Order: Contains information about an order, including an array of the purchased line items. Line items contain important fulfillment information, such as the associated variant, the quantity purchased, and the fulfillment status.
Location: Represents a geographical location where a line item can be fulfilled from. A fulfillment service always has its own location, and variants managed by the fulfillment service should always be fulfilled from that location.
Fulfillment: Represents a shipment of one or more items in an order. It includes the line item that the fulfillment applies to, its tracking information, and the location of the fulfillment.
FulfillmentService: Represents a third-party warehousing service that prepares and ships orders on behalf of the store owner. Each fulfillment service is associated with its own location. When you create a fulfillment service, a new location is automatically created and associated with it.
Update a Fulfillment Tracking
Search for Fulfillments
Get a Fulfillment
Create a Fulfillment Event
Fulfillment Order
Search Assigned Fulfillment Orders
List Fulfillment Orders
Get a Fulfillment Order
Cancel a Fulfillment Order
Hold a Fulfillment Order
Release a Fulfillment Order Hold
Relocate a Fulfillment Order
Send a Fulfillment Request
Send a Cancellation Request
Fulfillment Service
Create a Fulfillment Service
Update a Fulfillment Service
Delete a Fulfillment Service
Accept a Fulfillment Request
Reject a Fulfillment Request
Accept a Cancellation Request
Reject a Cancellation Request
Close a Fulfillment Order
Inventory
Search for Inventory Levels
Adjust an Inventory Level
Update an Inventory Level
Connect an Inventory Item
Delete an Inventory Level
Search for Inventory Items
Update an Inventory Item
Abandoned Checkouts
Search for Abandoned Checkouts
Watch Abandoned Checkouts
Transactions
Create a Transaction
Search for Transactions
Discounts
Search for Discount Codes
Create a Discount Code
Update a Discount Code
Delete a Discount Code
Create a Price Rule
Metafields
Search for Metafields
Get a Metafield
Create a Metafield
Update a Metafield
Delete a Metafield
Payments
Search for Disputes
Search for Payouts
Themes
List Assets
Create or Update an Asset
Get an Asset
Delete an Asset
Other
Make an API Call
Make a GraphQL API Call
New Event
Common Issues
Errors: [API] This action requires merchant approval for <XXXX_XXXX> scope
You need to create a new connection with a required scope.
Unfortunately, when you create a new connection, all previously used scopes are removed from your account, and only scopes added in the latest connection are used for all your connections (including the previously created connections).
Include all needed scopes in the new connection.
Legacy article, imported from the original Boost.space knowledge base (/knowledge-base/applications/commerce/shopify/).
 ).
).